You’re a diehard New Era fan. You own a variety of different caps, from the classic, 59Fifty fitted, all the way to more obscure variants like the 9Forty, 9Twenty, and the low-profile 29Twenty. Whether it’s basketball, baseball, football, or hockey, you’ve got the perfect hat for every occasion, garnering you the title of ‘Cap Guy’ within your social circle. But what would your friends think if they found out that a pro of your stature didn’t know how to take care of his own collection?
We’re talking cleanliness. We’re talking newness. We’re talking fresh… ness. There’s no doubt that the telltale sign of a New Era ‘newbie’ is an inability to keep your hat from accruing sweat stains – or any stain, for that matter. Dust, dirt, grease, oil: all of these things can be a detriment to your hat’s overall composure, and given the correct amount of time, can turn your prized possession into something much more regrettable. So, it’s about time you learned how to keep your favorite New Era model from kicking the bucket, right? We think so, too.
Why We’re Qualified
As one of San Diego’s foremost hat providers, it’s safe to say that we know a thing or two about keeping your companion at the top of its game. From bespoke hat cleaners, all the way to tried-and-true compounds, we’ve tried everything under the sun. And, thanks to our loyal customers, we’ve heard some of the inevitable horror stories involved with the process of cleaning a cap blind. No, not “blind” blind. Lack of experience, blind. That means that we’ve got a wealth of knowledge that the traditional cap owner might find useful. Call us the Cap Daddies of Southern California.
Now, let’s get down to business. We’re going to coach you on the do’s and don’ts of contemporary cap cleaning, without all the filler that you’ll find in other guides. After all, there’s no need to make something as simple (and common-sense) as hat hygiene, into something that might take a Doctorate to decipher.
First, let’s start with some general guidelines. Some basic, some arbitrary, some a bit more intriguing.
DO:
-Utilize the God-given gift that is the “lint roller.” This guy will help you to keep your cap free of dirt, dust, and lint in-between wears. It’s recommended that you use a lint roller after every outing, but we think that’s overkill. Use your own judgment and make sure that if you’re wearing your cap in an environment that might warrant additional care, lint rolling is always a solid step to take.
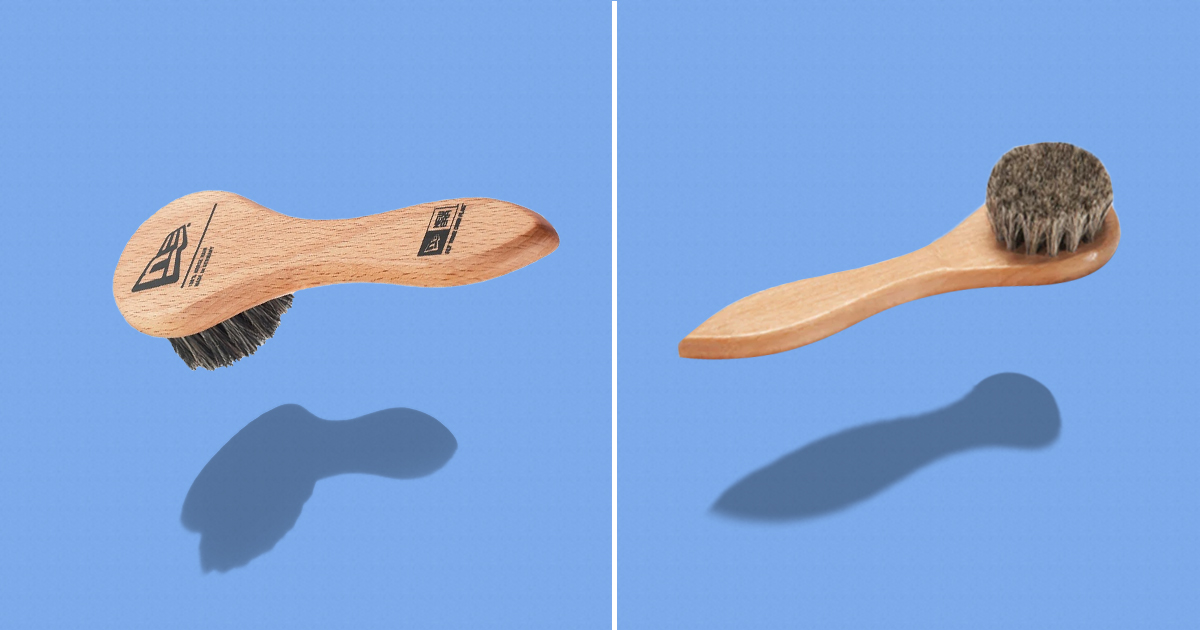
-Invest in a cap brush or any other fine-bristled grooming accessory to give your hat some more thorough reprimand. Sometimes, a lint roller won’t be enough to rid your headwear of troublesome dirt, or stubborn particulates. There are a handful of companies that make these, but we recommend New Era’s very own Cap Brush, Atzi’s more affordable option, or Valentino/Brixton’s refined models.
-Got some baby wipes laying around the house? These are great for dabbing the visor and inner sweatband of your cap after a day of wear. Make sure you’re using the plain ones, though, as fragrances can leave your cap with a scent that you might not find too appealing.
-Hand wash. When it comes to a thorough deep clean, we cannot stress this method enough. The myths of dishwasher cleaning and washer/dryer being viable ways to clean your cap were dispelled long ago, so don’t be a chump. If you want your hat to lose its color, form, and luster, be our guest. Otherwise, DO NOT throw your headwear piece into the washer, dryer, or dishwasher – heat, detergents, and other inhibitors are your hat’s worst enemy.
DON’T:
-Soak your cap in water for a prolonged amount of time. Warm or cold, this is a free, no-frills ticket to ruining your favorite baseball cap. Not only does this allow for those nasty stains to settle into its fabrics, but it’s also going to leave your brim looking like a hot mess – depending on the material that it’s made out of.
-Use powder detergents, soaps, or other questionable substances, as they can fade, foul, and destroy your cap’s beautiful exterior.
-Bleach is a no-go. Stay far, far away from bleach, or any cleaning agent that incorporates bleach. But, if you’re all about that “acid washed” look, who are we to stop you?
-As we’ve stated above, never throw your cap into the washer/dryer, or dishwasher. Not only will this ruin the form of your cap, but the high heat – coupled with abrasive cleaning agents – will leave your favorite companion in a sad, sorry state. Could you bear the guilt? We couldn’t.
Now, let’s dive into the general guidelines for cleaning. These rules are accepted as “simple” and “safe,” giving you the results you want, without putting your hat in harm’s way.
Step 1:
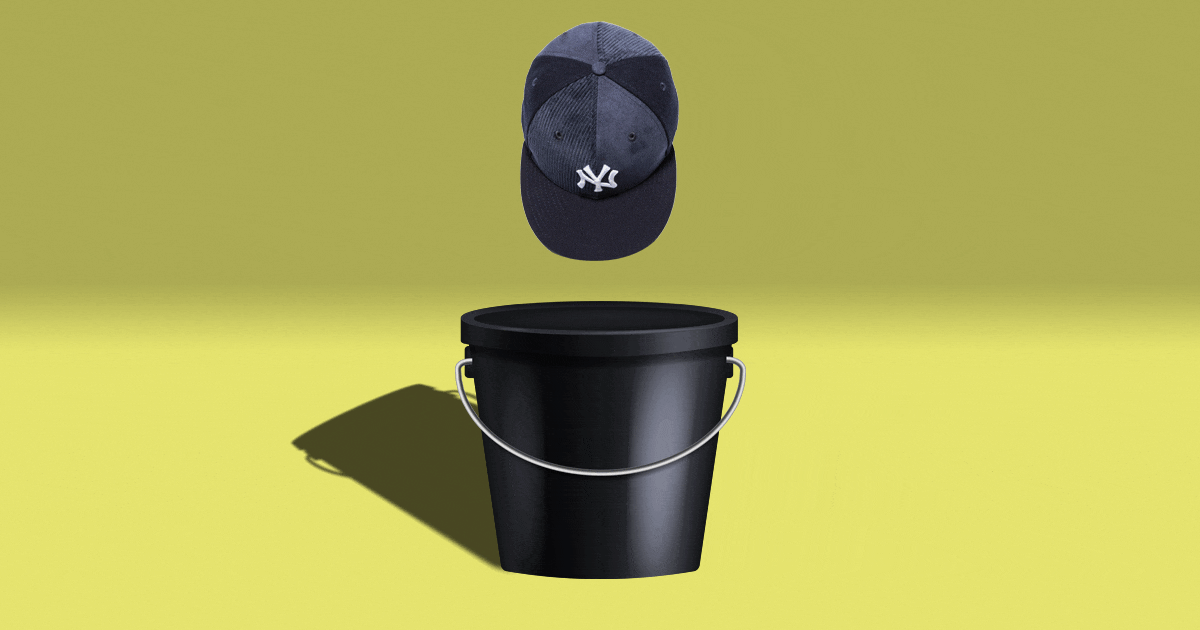
Fill your sink, bucket, or bathtub with lukewarm water. Not hot, not too cold. Right in between. MAKE SURE that you clean and sanitize the surface of your preferred container prior to use. This will ensure that your cap doesn’t catch a stray – collateral damage is never fun, unless you’re Arnold Schwarzenegger.
Step 2:
While your container is filling, add a tablespoon of your preferred detergent or dish soap. Liquid, not powder. There are a lot of recommendations floating around the vast oceans of the interweb, but we’ve found that OxiClean tends to be at the top of the list. If you haven’t succumbed to Billy Mays’ (RIP) relentless badgering over the years, you might not have a 10-gallon bucket of this stuff in the cleaning closet at your house. If that’s the case, any MILD detergent or dish soap will do – just make sure that it’s free of harsh agents like bleach and alcohol.
Step 3:
Give your cap a brief dip in the water that you’ve added to your sink, shower, bucket, or tub. Do not let it soak; quick submersion is more than enough. After you’ve completed this step, you’ll be able to whip out a clean toothbrush (or any other small, toothbrush-like peripheral) and spot clean. Look for small areas on the hat that have accrued dust over time. Treat these with extra care, scrubbing GENTLY in a circular motion. Repeat this process for other problematic areas of the hat.
Oh, and a quick tip: try to avoid scrubbing/rubbing against the cap’s exposed threading. If you do, it can wear down the exterior of the thread, causing it to fray, pull, or become damaged. We’re trying to make the hat look better, not worse.
Step 4:
Once you’ve spot cleaned the problem areas of the hat, it’s time to take a look at the interior. To get rid of any built-up dirt or oil on the sweatband, take extra care with the toothbrush you’ve used on the exterior of the cap, or use your fingers to get the water/soap mixture worked into the fabric. This is often the most difficult part of the hat to clean, so don’t become discouraged if you aren’t seeing results. Let the formula set in for a couple of minutes, scrub again, and repeat as necessary until you feel that you’re as close as you’re going to get.
Give the hat another dip in a separate bucket, sink, shower, or tub (filled with clean water). Do this until you can ensure that the detergent/soap cannot be seen by the naked eye. When you feel that you’ve cleaned the fabric of any remaining solutions, move on to the next step.
Step 5:
Now it’s time to let the cap air-dry. Do not try to speed up this process with any type of heat source, including hairdryers, heaters, or similar accessories. If you can, place the hat on something that will help it to keep its form while drying. This is where things like hat-shapers come into play. If you don’t have one lying around the house, use a jar – or something similar – to let gravity do its job. Fans or hair dryers on COOL settings can help to rid the cap of extra moisture.
Step 6 (Optional):
Once the hat is dry, you can go the extra mile by applying something like a starch spray or fabric protector to deter stains. These can also help the hat to keep its form, prolonging its life in the long term.
If you’re too lazy to go through the motions mentioned above, check out some of the amazing products from the guys over at Crown Kleen — an all-purpose suite that specializes in pre-packaged hat-care solutions.
Now that you know how to clean your cap, it’s time to revitalize your collection! It might take some time, but trust us, it’s worth it in the end.